

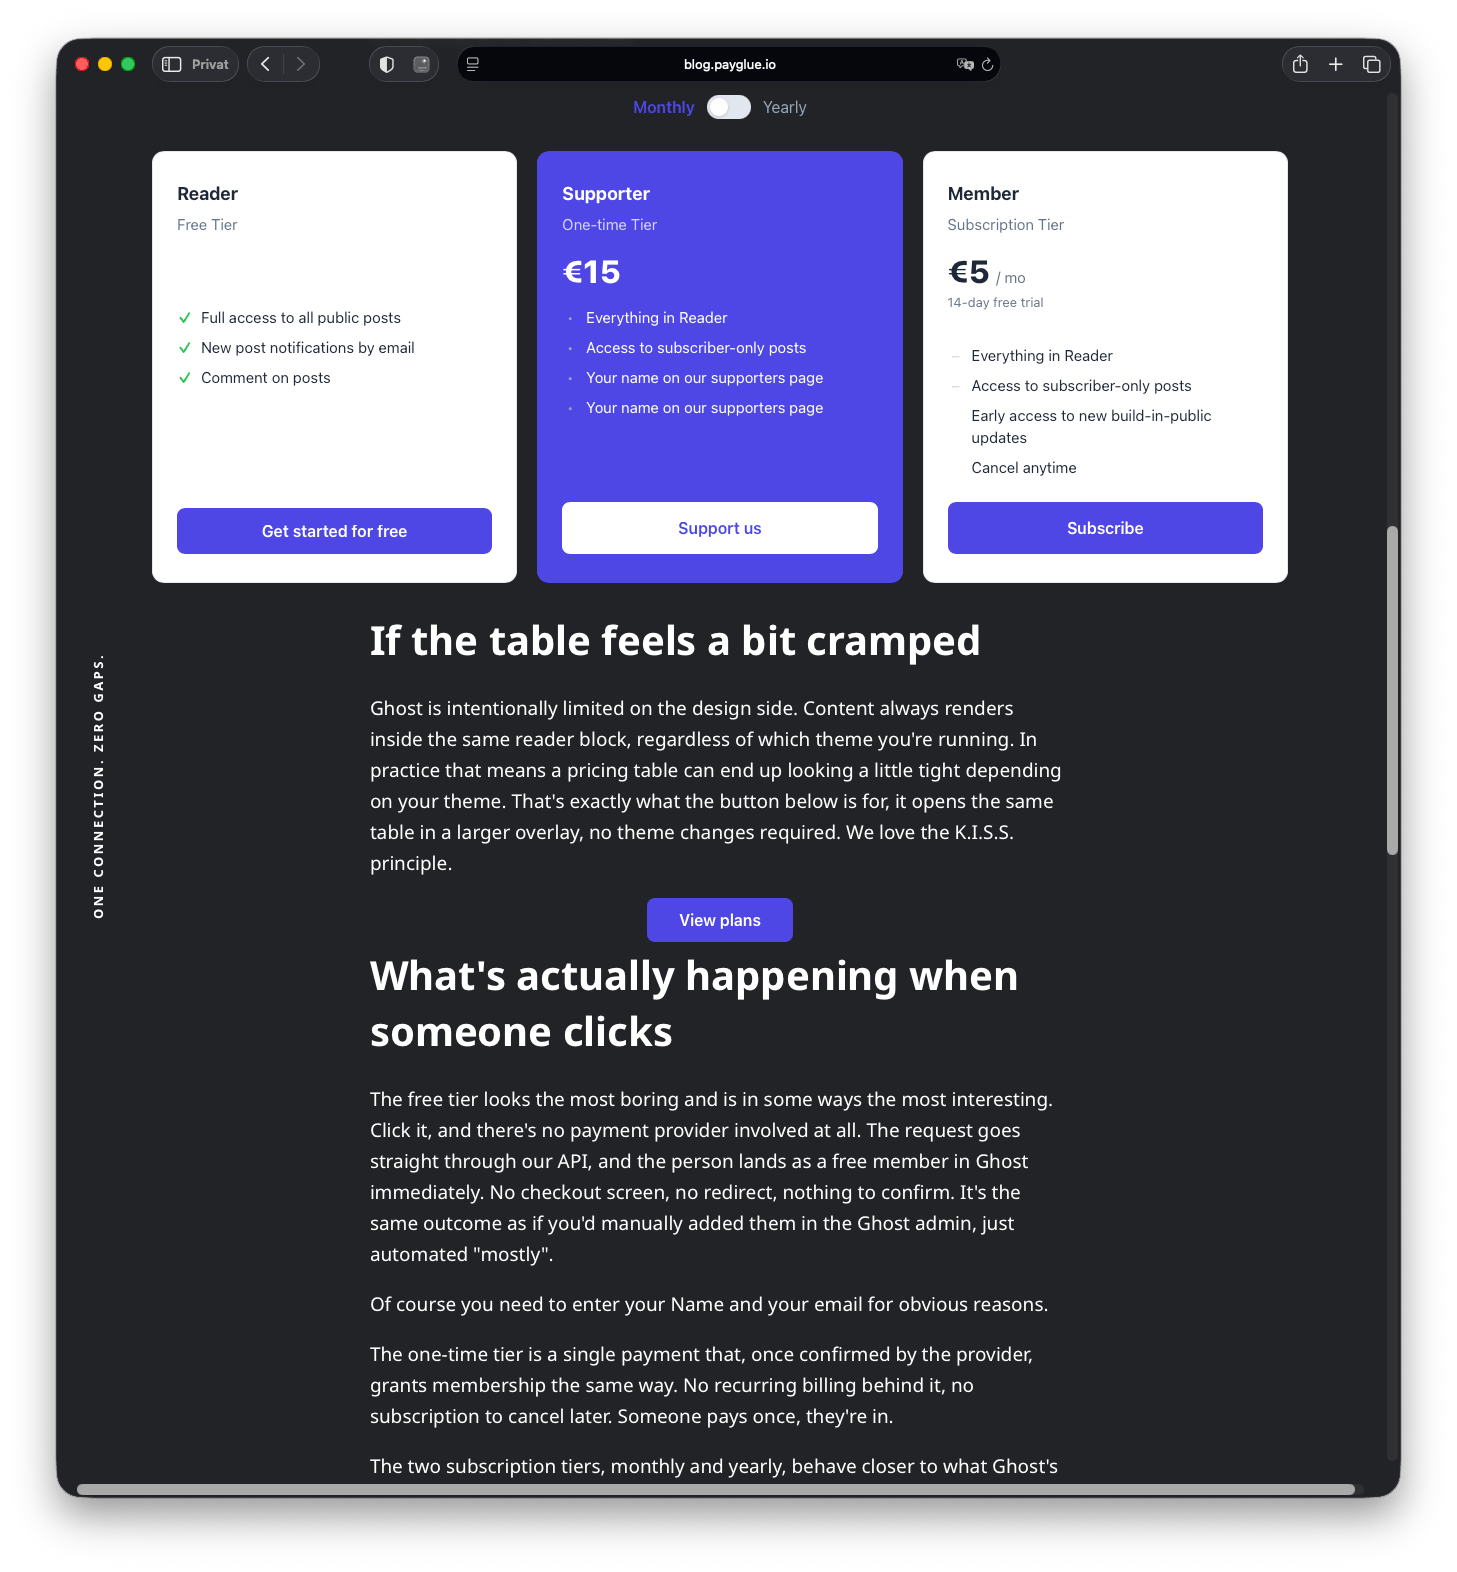
Create a pricing table
- Open the Pricing Table section in your PayGlue dashboard under Installation > Pricing Table.
- Click New table.
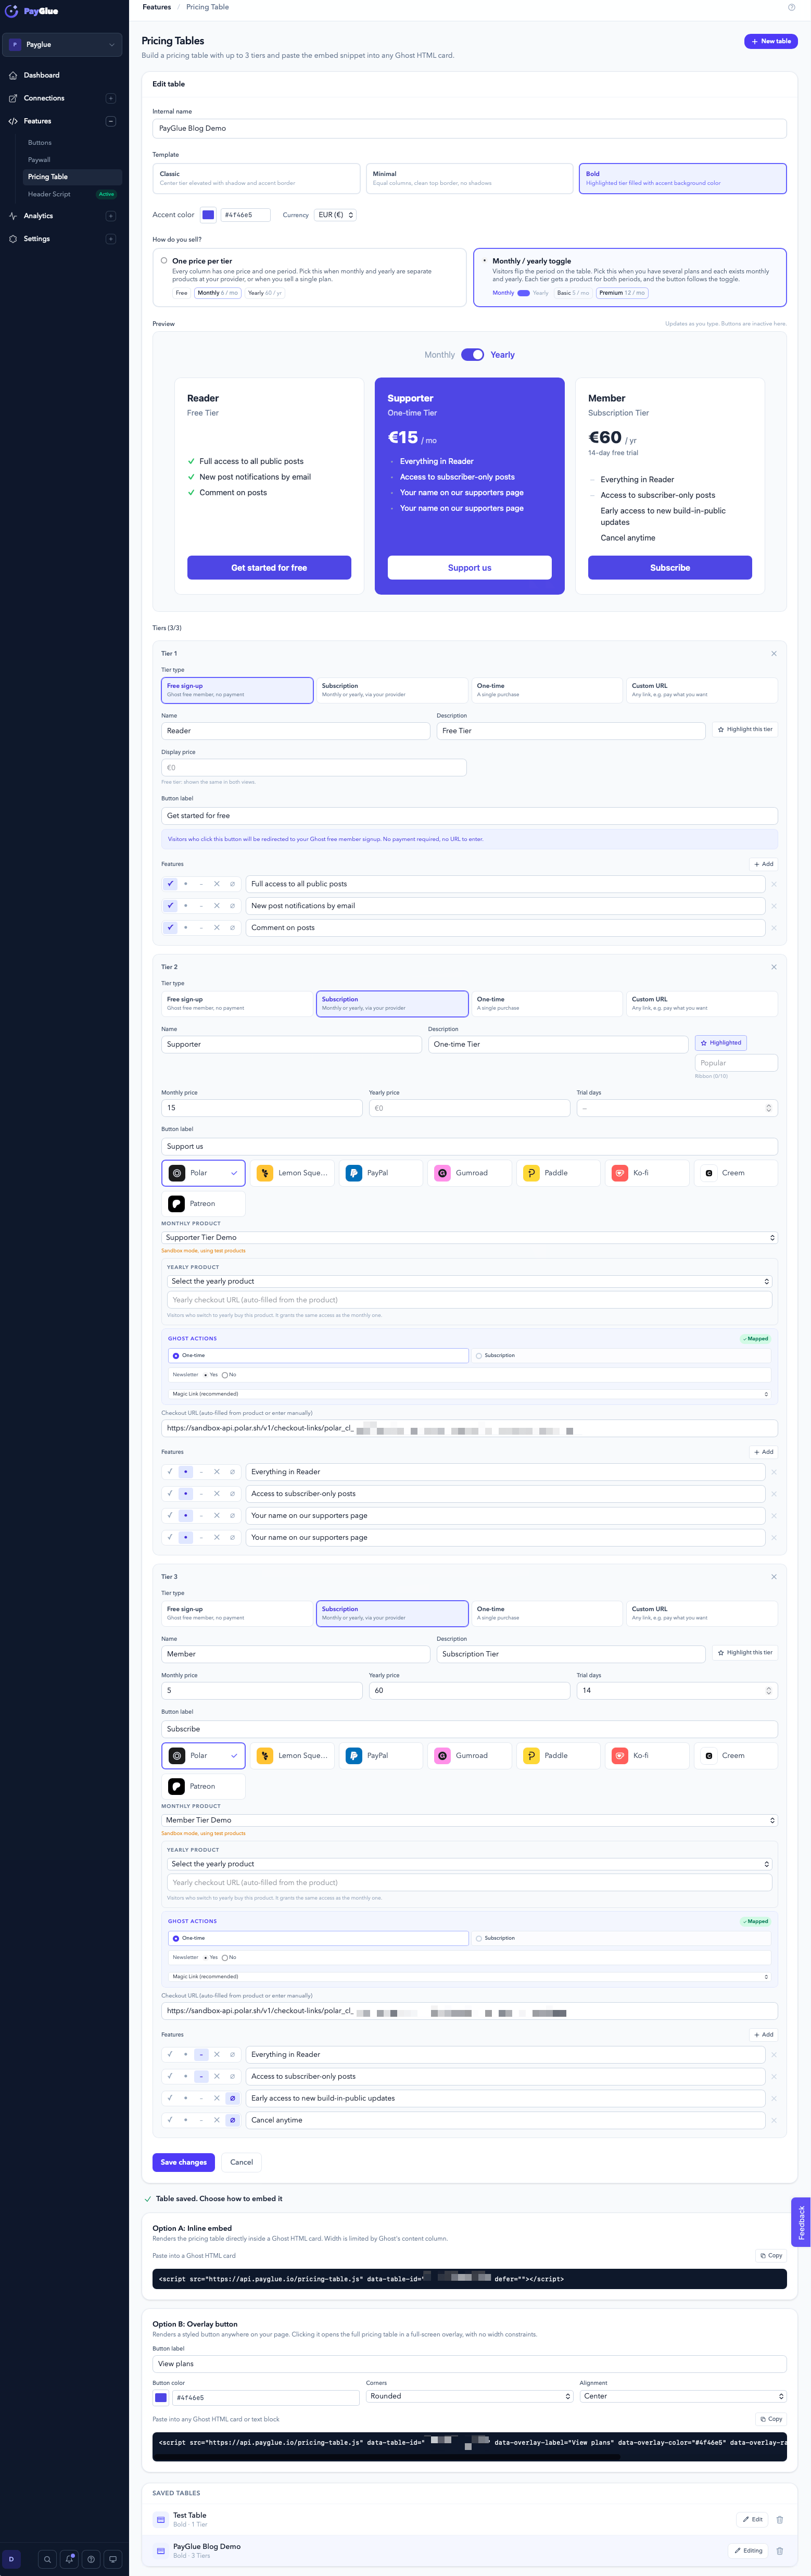
- Give your table a name (internal only).
- Pick a template: Classic, Minimal, or Bold.
- Set an accent color for buttons, toggle, ribbon badge, and highlighted card.
- Add up to 5 tiers. Each tier has its own CTA type (see below).
- Click Save.
CTA types
Each tier can have one of four call-to-action types:
For One-time and Subscription, select a product from your provider catalog — the checkout URL fills automatically.
How do you sell?
As soon as one tier is a subscription, the editor asks how you sell. Two choices, with an example of each:- One price per tier. Every column has one price and one period,
/ moor/ yr. Pick this when your monthly and yearly plans are separate products at your provider, or when you sell a single plan. Example: Free, Monthly 6 / mo, Yearly 60 / yr, each with its own product and its own button. - Monthly / yearly toggle. Visitors flip the period on the table. Pick this when you have several plans and each one exists monthly and yearly. Every subscription tier then has a monthly price and a yearly price, a monthly product and a yearly product. The button follows the toggle: in the yearly view it opens the yearly product’s checkout.
Both products of a toggled tier grant the same access in Ghost. A monthly and a yearly buyer of “Premium” are both Premium. The rule for the yearly product is created when you save, like the monthly one.
Preview
Below the question sits a preview of the table, rendered by the same script your readers load. It updates as you type, so you can watch the toggle, the prices and the symbols change before you save. The buttons in the preview are inactive.Feature list
Every tier has a list of features. Each line has a symbol: a check mark for what is included, a dot or a dash for neutral lines, a cross for what is not included, or no symbol at all. The cross is meant for a free tier that lists what the paid tiers add.Highlight and ribbon badge
Toggle Highlight this tier on any tier to visually emphasize it. When highlight is on, a ribbon badge appears in the corner. The default text is Popular (max 10 characters). You can change it to anything that fits your copy.Embed options
Once your table is saved, two embed snippets appear.Option A — Inline embed
Paste this into a Ghost HTML card. The table renders inline in your post or page and automatically breaks out of Ghost’s content column to full viewport width.Option B — Overlay button
Paste this into any Ghost HTML card or text block. It renders a styled button. Clicking the button opens the full pricing table in a full-screen modal overlay, with no width constraints.Recommended flow
Ghost’s Portal shows paid tiers only when Stripe is connected. The pricing table is where your readers see the paid options instead, so give it a home:- Create a membership page in Ghost, for example
/membership/, that explains free and paid, and embed the pricing table there. - Make the first column a Free sign-up CTA and the other columns your provider products. Free readers and paying readers start on the same page.
- In Ghost Admin, go to Settings > Membership > Tiers, open the Free tier and set its Welcome page to the membership page. Every free signup then lands on the paid options after clicking the magic link.
- Put the membership page in your site navigation, and point your paywall overlays at the same offers.
Tips
Ghost clips content with overflow hidden. The inline embed handles this automatically by removingoverflow: hidden from ancestor elements on load. You do not need to edit your Ghost theme.
Toggle not changing prices? Make sure you have entered a value in both price fields for each subscription tier. If one is empty, the other price is shown in both views. If you do not want a toggle at all, choose One price per tier under “How do you sell?”.
Using the overlay button as an alternative to inline. If your Ghost theme makes inline embeds look cramped, use the overlay button instead. The modal overlay has no theme constraints and always looks clean.