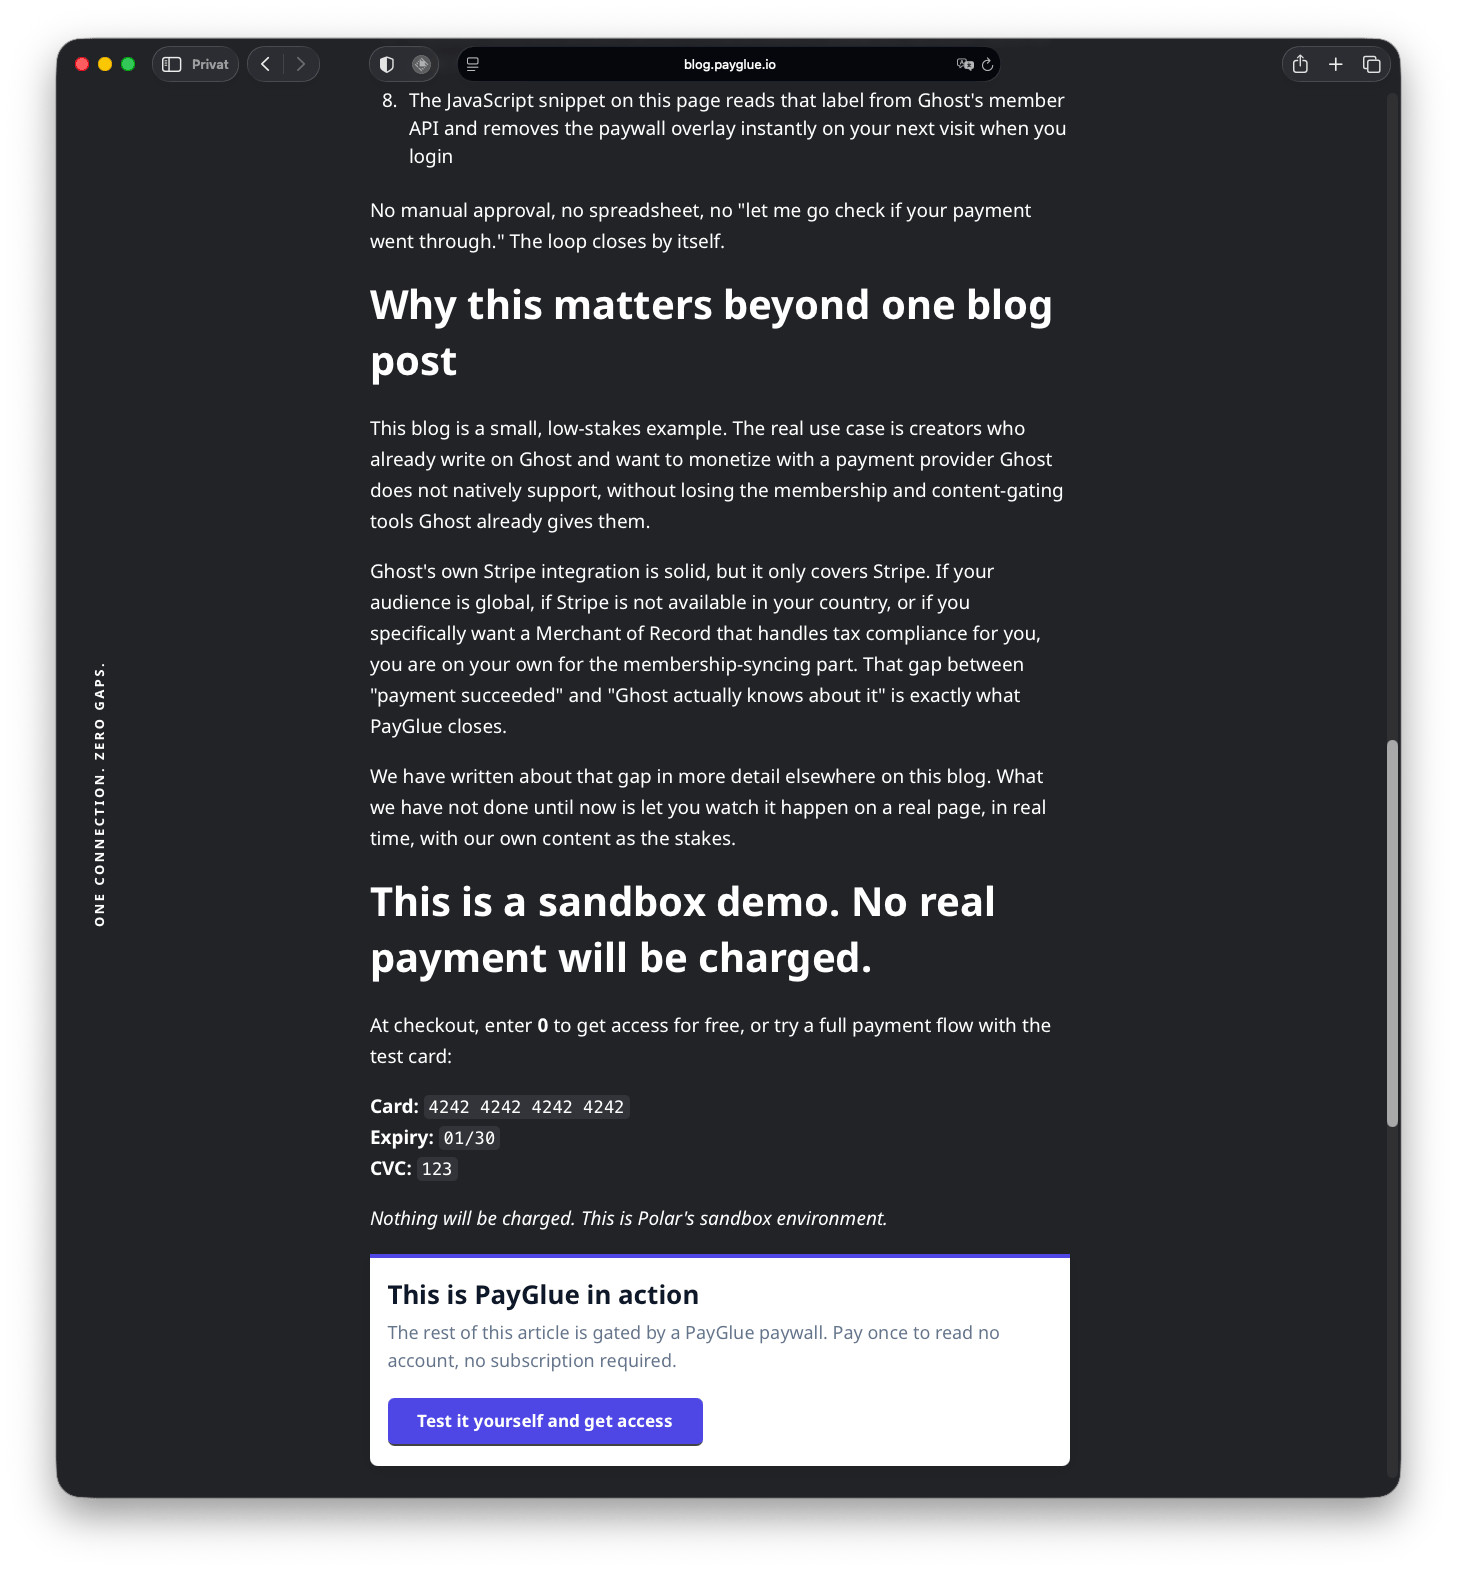
The PayGlue Paywall hides content on any Ghost post or page so that only members who have purchased access can read it. It works without Stripe: your payment provider handles the purchase, and PayGlue grants Ghost membership automatically after the transaction.
Payglue Paywall Deno

How it works

A small script in your Ghost site header checks whether the logged-in member has active access. If not, a paywall overlay appears over the locked content below the embed point. The overlay disappears automatically as soon as the member logs in with an account that PayGlue has already granted access to after a completed purchase.
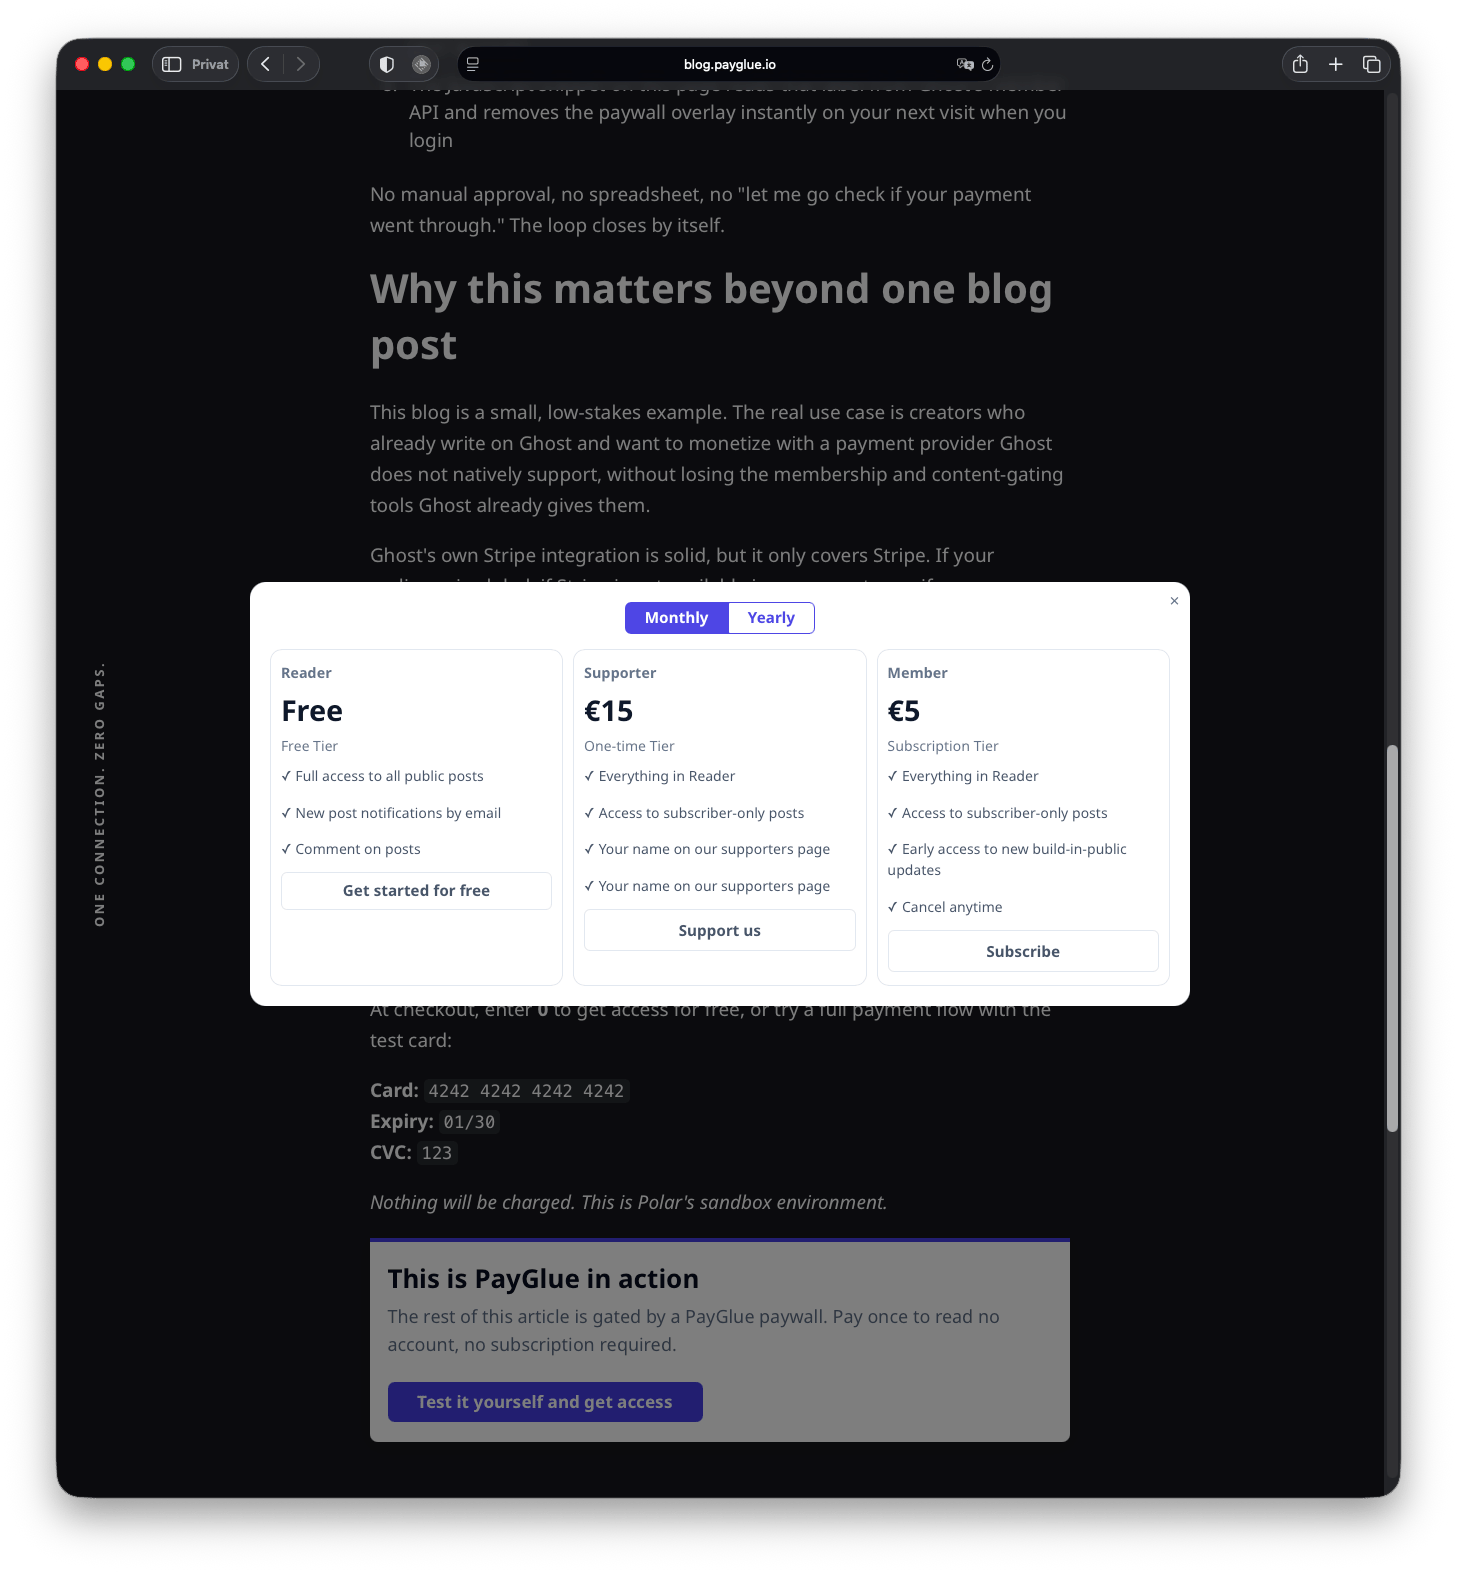
Payglue Paywall Click

What you need

Before using the Paywall, the following must be in place:
  • Ghost is connected in PayGlue (Admin API key added)
  • A payment provider is connected
  • At least one product and one mapping are configured in PayGlue
  • The PayGlue header script is installed in your Ghost site header
The overlay appears as soon as the header script and embed are in place. Members can only unlock content once the full payment flow is working: provider connected, product mapped, webhook active.

Who the Paywall lets through

A visitor passes when their Ghost member record is any of the following: All three pass, so moving a post from Ghost’s own visibility settings onto a PayGlue Paywall keeps your existing subscribers. There is nothing to prepare.

Three ways to gate a post

Ghost’s own post visibility is the only gate that works on the server: for a restricted post, Ghost does not send the gated part to a visitor who is not allowed to see it, in the browser, in the RSS feed, on the social web or through the Content API. That gate does not need Stripe. What needs Stripe is the paid level inside it. The PayGlue overlay is a third way that needs neither, and it works in the browser instead. The implications in one line each:
  • Option 1 is a soft gate. Your providers are right at the wall, and the gated part stays readable in feeds, APIs and for anyone with JavaScript off. Fine for newsletters, archives and community posts; wrong for anything that would matter if it leaked.
  • Option 2 is hard against the outside world and open to anyone who signs up for free, because without Stripe every member is a free member. Pair it with a membership page so free readers see your paid options.
  • Option 3 is the real paid gate, for buyers through any provider, at the price of an idle Stripe account and a home for your offers outside Ghost’s upgrade box.
You can mix them across one site. The rest of this page sets up option 1, the PayGlue overlay.
The long read behind this table, with the two families of paywalls, why every external paywall for Ghost runs in the browser, and why that is fine: A Paywall Is a Door, Not a Vault on the PayGlue blog.
Never put credentials, personal data, download links to paid files or anything else behind the overlay that would matter if a determined reader got through. The overlay is for reading access, not for secrets.

Setup

1

Install the header script in Ghost

In your PayGlue dashboard, go to Installation > Header script and copy the header script.
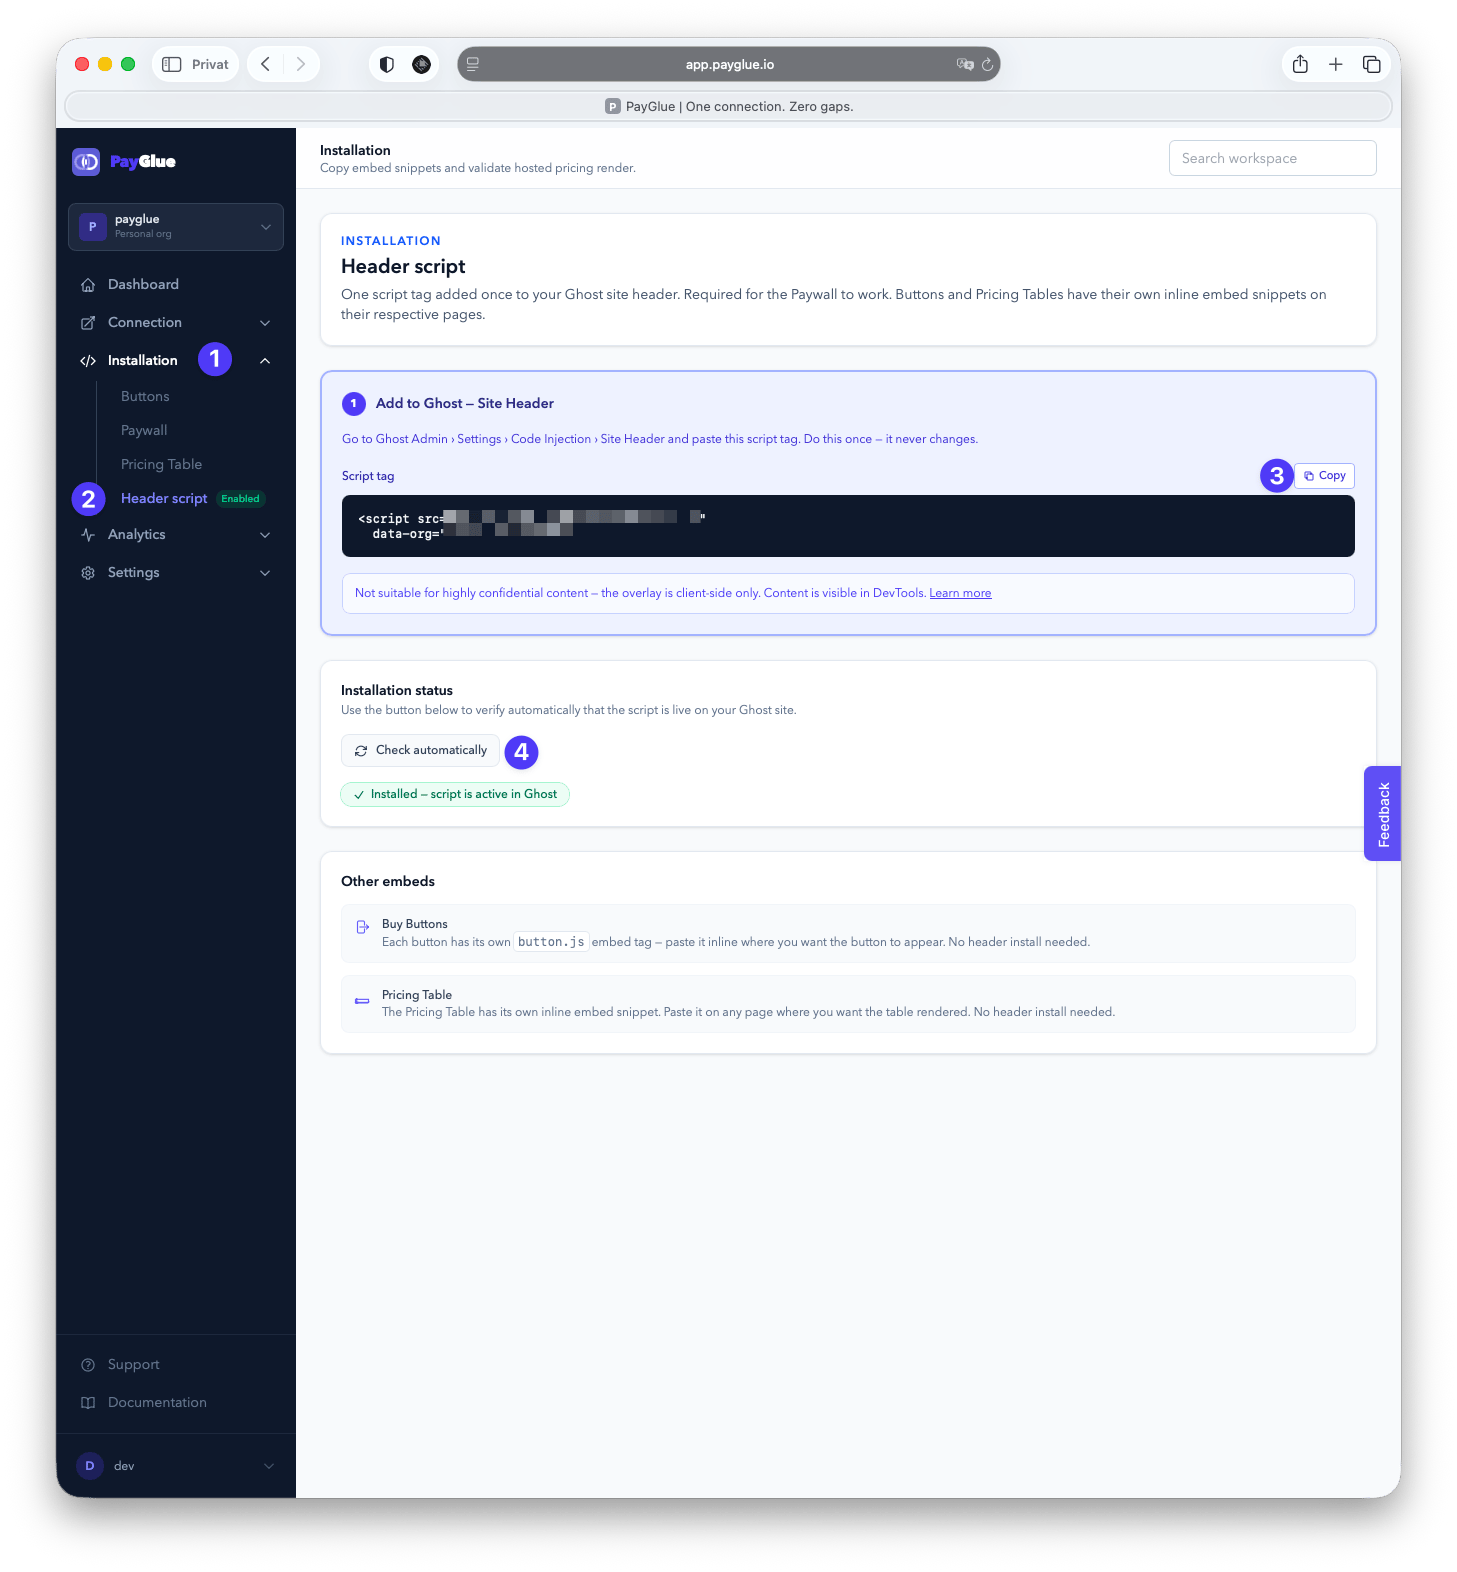
Payglue Hjeader Script
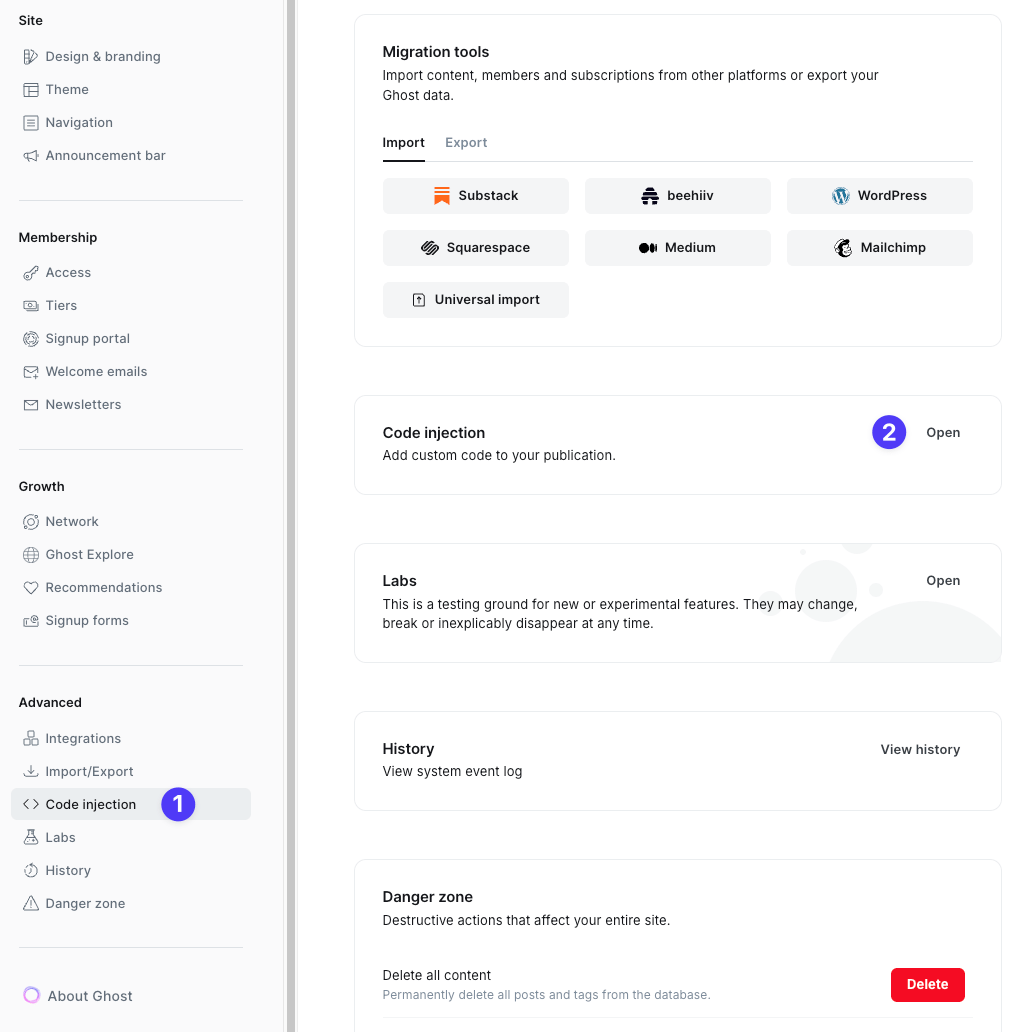
Open Ghost Admin and go to Settings > Code Injection > Site Header. Paste the script and click Save.
Ghost Custom Code
The script only needs to be installed once. It runs on every page of your Ghost site automatically.
2

Create a Paywall config

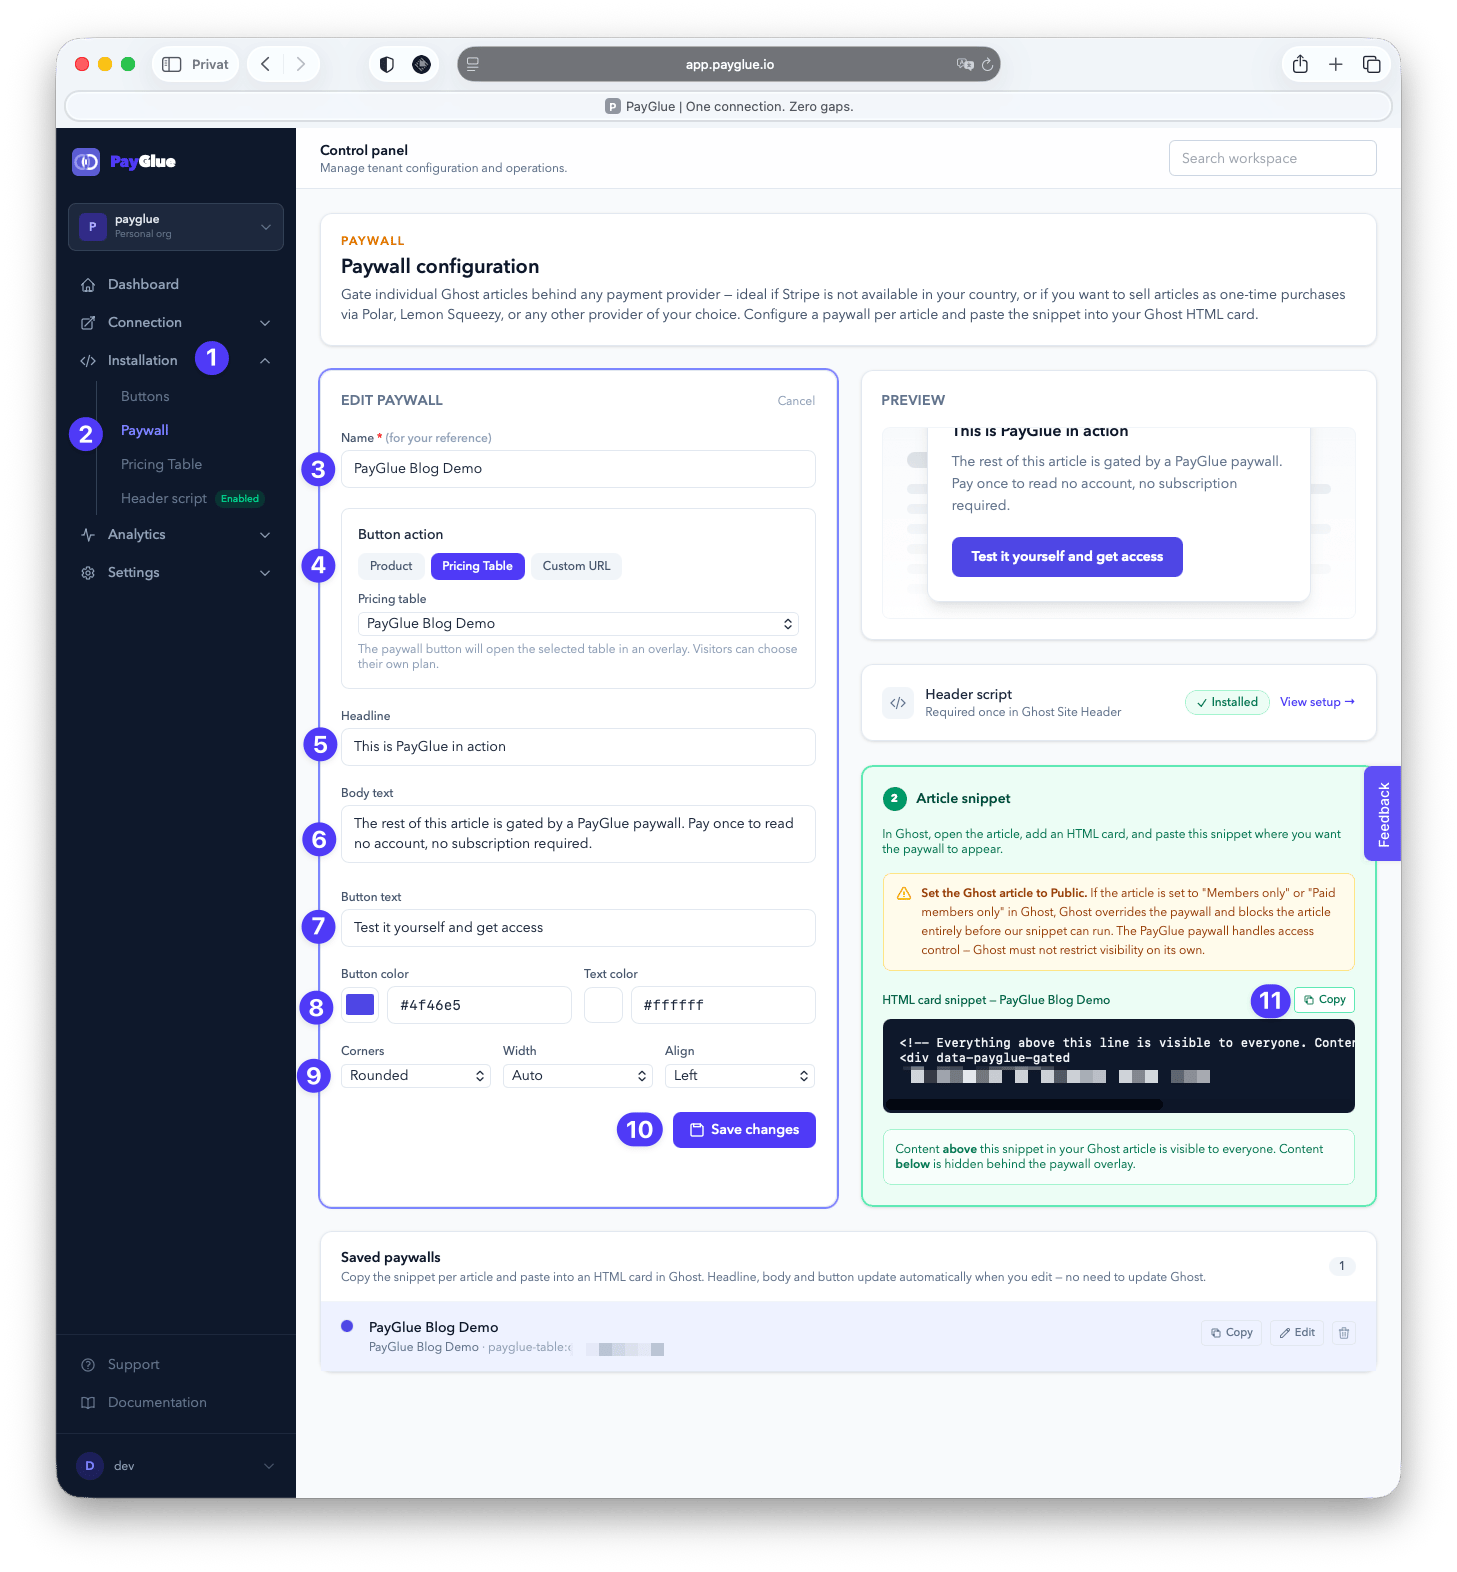
In your PayGlue dashboard, go to Installation > Paywall and click New paywall.Fill in the overlay fields:
Payglue Paywall Edit
Setting the button link, two options:Link a product (recommended): select a product from your connected provider catalog. The checkout URL fills in automatically.Custom URL: paste any URL manually. Use this for providers that don’t yet support the product picker, for PWYW links, or for Ghost portal links.The live preview on the right updates as you type so you can see exactly how the overlay will look before saving.Click Save. The embed snippet appears below the form.
3

Embed in your Ghost post

Open the Ghost post or page where you want to protect content.Add an HTML card at the exact point where the paywall should begin. Paste the embed snippet from Step 2 into the card.Everything above the HTML card is visible to all visitors. Everything below is hidden behind the paywall overlay.
Set the Ghost article visibility to Public. Do not use Ghost’s built-in “Members only”, “Paid members only”, or “Specific tiers” visibility settings on articles that use a PayGlue Paywall. If Ghost restricts the article itself, it blocks access before the PayGlue script can run, so the paywall overlay never appears and visitors see a Ghost login wall instead. PayGlue handles access control; Ghost must not restrict visibility on its own. Because the post is Public, its full text stays in the feed and the APIs, see option 1 for what stays readable.
4

Test the paywall

Open the post in a private or incognito window. The paywall overlay should appear over the content below the embed.Log in with a Ghost member account that has active PayGlue access. The overlay should disappear and the full content should be visible.

Customizing the overlay

You can update the headline, body text, and button style in the Paywall config at any time. Changes apply immediately to every post using that config, without touching the embed in Ghost.

Using multiple Paywall configs

You can create multiple configs, for example one per product or content category. Each config has its own embed snippet. Different posts can show different overlay text and link to different checkout pages.

Content above the embed is always public

Only content placed after the embed snippet is hidden. Place a teaser paragraph or preview image above the embed so visitors understand what they are unlocking before they see the overlay.

Ghost’s own gate vs. the PayGlue overlay

Ghost has its own member gate, and it is the stronger one: it holds content back on the server. Without Stripe it only knows free members (option 2); with a Stripe account connected, PayGlue buyers pass it as comped members (option 3). The PayGlue overlay (option 1) works with any payment provider, needs no Stripe, and puts your offers right at the gate, at the price of being a client-side gate.