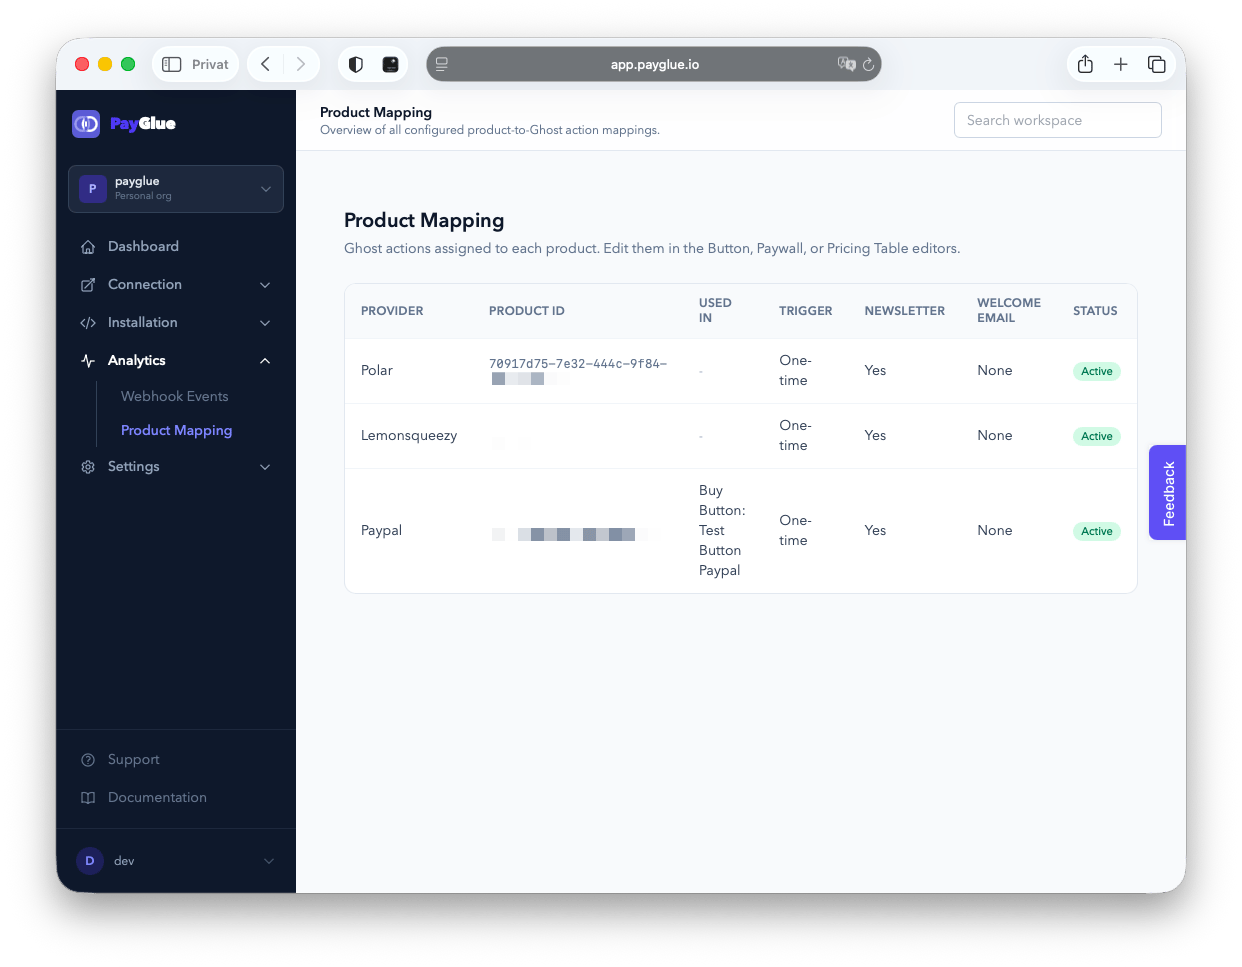
PayGlue does not assign Ghost tiers. Access is recorded on the member itself: as the comped flag when a Stripe account is connected to Ghost, or as the
payglue-active label when it is not. A product:<key> label says which product was bought, so several products stay distinguishable in your member list. See Do I need Stripe? and Member labels.Running more than one Ghost blog? Create a separate provider product per blog and map each one only in the organization it belongs to. Mapping the same product in multiple organizations grants Ghost membership on all of them for a single purchase. See the FAQ for details.
Where mappings are created
Mappings are not created on a dedicated page. Instead, you configure them inline when you set up a Buy Button, Paywall, or Pricing Table. When you select a product and choose what should happen in Ghost in one of those editors and click Save, the mapping is recorded automatically.1
Open an editor
Go to Installation > Buttons, Paywall, or Pricing Table in your PayGlue dashboard and open or create an item.
2
Select a provider and product
Choose your payment provider and select the product. Choose Link a product as the link type. Select your payment provider and the product you want to map.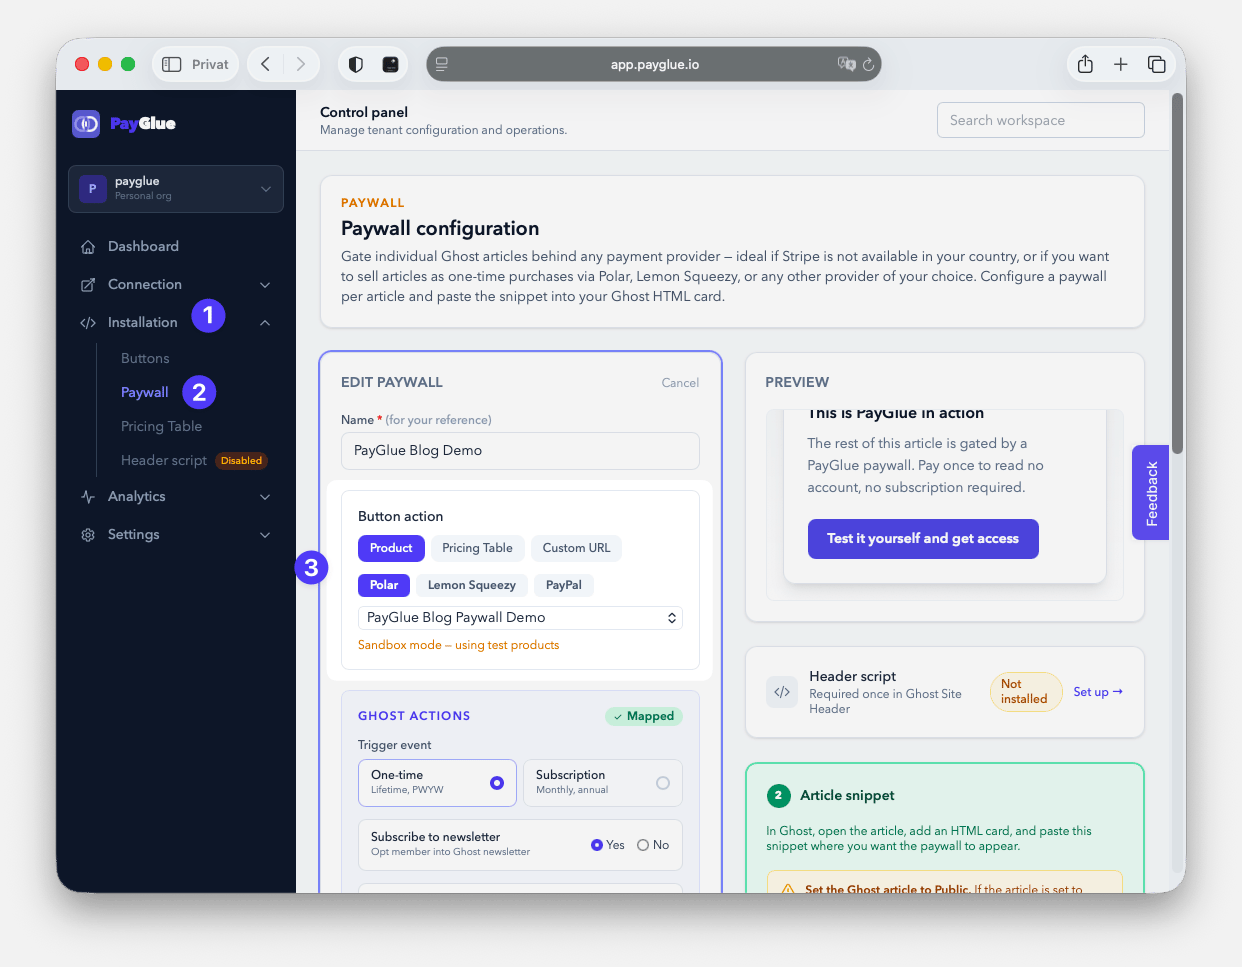
3
Configure Ghost settings
Choose what happens after the customer buys a product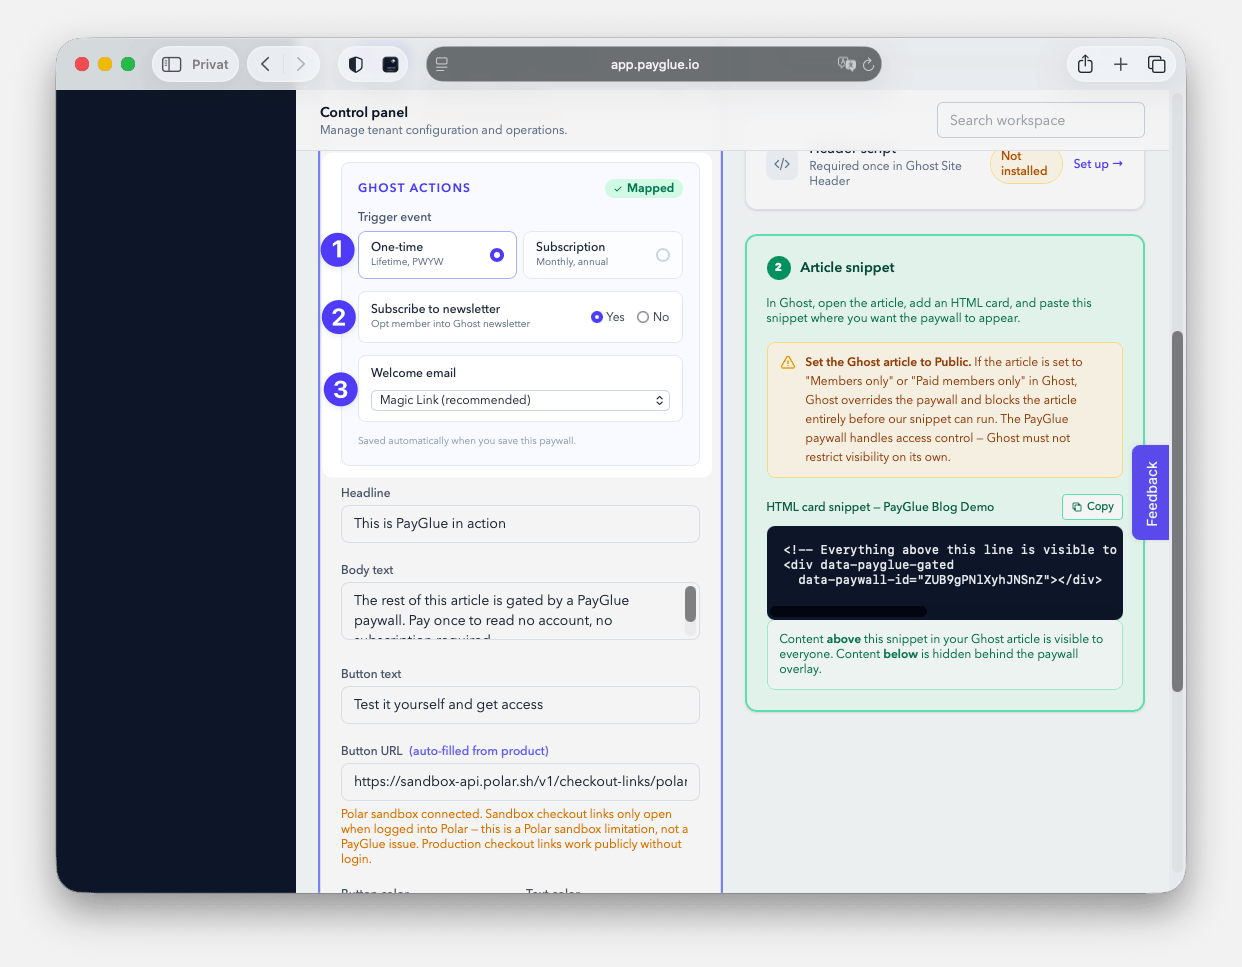
- One-Time or Subscription
- Subscribe to the newsletter (default: yes)
- Welcome email for the new member (magic link is recommended)
4
Configure email
Select which welcome email Ghost should send. Magic link is recommended.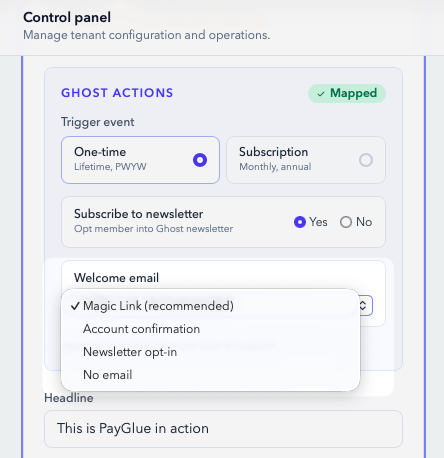
5
Save and copy the webhook URL
Save the mapping. Copy the webhook URL and add it to your provider’s webhook settings.
6
Save
Click Save. The mapping is created automatically and appears in Analytics > Product Mapping.
Viewing all mappings
Go to Analytics > Product Mapping in your dashboard to see all configured mappings: which product grants access, the trigger event type, and where each mapping was created (button, paywall, or pricing table).